In a world where everyone’s a photographer thanks to their trusty iPhones, standing out from the crowd can feel like trying to find a needle in a haystack. But fear not! Capturing stunning, professional-quality photos with just a smartphone is not only possible, it’s downright fun. With a few insider tips and tricks, anyone can transform their snapshots from “meh” to “wow” faster than you can say “cheese!”
How to Take Professional Pictures With iPhone
Understanding the iPhone camera enhances photography skills. Familiarity with its functions boosts photo quality significantly.
Camera Features Overview
iPhones come equipped with various features that elevate photography. The dual or triple lens systems capture depth and detail, allowing for stunning portraits and landscapes. Night mode enhances low-light images efficiently. Portrait mode creates a professional background blur, emphasizing the main subject. Smart HDR ensures that bright and dark areas are well-balanced in a shot. Additionally, advanced built-in editing tools allow for immediate enhancements. Taking advantage of these features plays a crucial role in achieving professional results.
Settings for Optimal Performance
Optimal performance requires specific settings adjustments. First, activating grid lines helps compose shots using the rule of thirds. Second, maximizing resolution through the camera settings ensures high-quality images. Image stabilization assists in minimizing blurriness, especially during movement. Third, adjusting exposure manually improves light balance. Enabling RAW format captures more detail, allowing for greater editing flexibility later. Incorporating these settings into everyday use leads to noticeable improvements in photograph quality.
Composition Techniques
Effective composition enhances the visual appeal of photographs taken with an iPhone. Utilizing specific techniques can transform ordinary images into professional-grade shots.
Rule of Thirds
The rule of thirds divides an image into a 3×3 grid, creating nine equal segments. Placing key subjects along the gridlines or at intersection points draws viewers’ attention. By avoiding central positioning, the composition gains balance and interest. Experimenting with this technique can significantly enhance the overall impact of the photograph. Using the grid lines option in the iPhone settings makes applying this rule straightforward and intuitive.
Leading Lines
Leading lines direct viewers’ eyes toward specific subjects within an image. These lines can be natural formations like roads or rivers, or architectural elements such as paths and bridges. They create a sense of depth and guide the viewer through the frame. Carefully positioning the camera to include these lines can result in more dynamic and compelling compositions. Utilizing perspective shifts can enhance the effect of leading lines, making photos appear more engaging and three-dimensional.
Lighting Essentials
Lighting significantly impacts photography quality. Understanding how to use natural and artificial light can elevate iPhone images.
Natural Light vs. Artificial Light
Natural light offers soft, flattering illumination for images. Photographers often capture portraits and landscapes during sunny days or overcast conditions. Window light provides another excellent option for indoor shots, creating a beautiful ambiance. Artificial light, including flash or studio lights, adds versatility for low-light situations. This type of lighting can create dramatic effects, though it may require adjustment to prevent harsh shadows. Each lighting source has its pros and cons, and experimenting with both can yield stunning results.
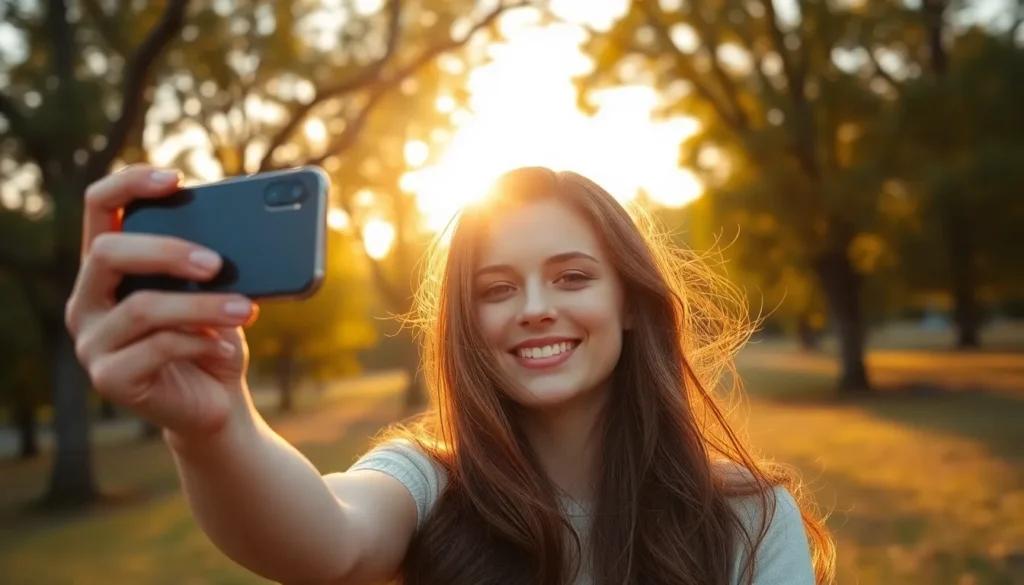
Golden Hour Photography
Golden hour refers to the period shortly after sunrise and before sunset. Photographers appreciate this time for its warm tones and softer shadows, creating a magical quality in images. Light color shifts from harsh direct sunlight to a more diffused, golden hue. This ideal condition enhances skin tones and adds richness to landscapes. Planning outdoor photography sessions around this time often results in more dynamic and captivating photos, maximizing the potential of the iPhone camera. Utilizing golden hour can transform ordinary scenes into extraordinary photographs.
Editing Photos on iPhone
Editing enhances photos, transforming them into visually striking images. Several iPhone tools and apps make this process straightforward.
Recommended Apps
Various apps improve the editing experience on iPhone. Snapseed offers a comprehensive range of features, including selective adjustments and filters. VSCO combines advanced editing options with a large collection of filters, perfect for creating unique looks. Adobe Lightroom provides professional-grade editing capabilities, such as detailed exposure and color adjustments. For quick edits, Instagram’s built-in tools facilitate basic enhancements, ensuring users can share photos quickly while still achieving quality. These applications provide valuable resources for both beginners and experienced photographers.
Basic Editing Techniques
Basic editing techniques significantly elevate photo quality. Cropping eliminates distractions and improves composition. Adjusting brightness enhances visibility while maintaining natural colors. Increasing contrast makes images pop, emphasizing details and depth. Utilizing saturation boosts color vibrancy, effectively creating striking visuals. Applying sharpen can refine edges, providing clarity. Lastly, filters offer creative flair, enabling quick transformations. Mastering these techniques can lead to impressive results.
Accessories for Enhancing Photos
Using accessories can significantly enhance iPhone photography. This section covers two essential tools to elevate image quality.
Tripods and Stabilizers
Tripods offer stability for long exposures or group shots. A sturdy tripod ensures no blurriness occurs during photography. Stabilizers assist in capturing smooth video footage, making them great for vlogging or action shots. Many compact options fit easily into bags for on-the-go photography. The added stability benefits both amateur and professional photographers, allowing creative angles without camera shake.
Lenses and Filters
Lenses expand an iPhone camera’s versatility. Wide-angle lenses capture landscapes and large groups effectively. Macro lenses focus on small details, perfect for nature shots or product photography. Filters enhance color and contrast, adding depth to images. Various options, like polarizers, reduce glare from reflective surfaces. These accessories push the limits of iPhone photography, creating eye-catching visuals that stand out.
Tips for Specific Scenarios
Capturing professional images with an iPhone requires adapting techniques to various scenarios. Below are strategies for achieving excellent results in both portrait and landscape photography.
Portrait Photography
For stunning portraits, focus on natural light sources. Sunlight during golden hour creates soft, flattering shadows that enhance facial features. Utilize portrait mode to achieve a professional background blur, emphasizing the subject. Adjust exposure manually to ensure proper lighting without overexposing highlights. Framing subjects using the rule of thirds adds narrative depth and draws viewers’ attention. Experiment with different angles, like slightly above eye level or side profiles, to reveal unique aspects of the personality.
Landscape Photography
Landscape photography thrives on selecting the right time and weather. Early morning provides soft light and fewer distractions. Utilize wide-angle lenses to capture expansive views, adding depth to images. Adjust the settings for maximum detail, such as enabling HDR to balance bright skies and dark land. Incorporate leading lines, like pathways or rivers, to guide the viewer’s eye through the scene. Lastly, explore unusual perspectives, such as low angles or elevated spots, to create captivating compositions that stand out.
Conclusion
Mastering professional photography with an iPhone is an exciting journey that anyone can embark on. By understanding the camera’s features and utilizing effective techniques, anyone can transform everyday moments into stunning visuals.
Incorporating proper lighting composition and editing tools elevates images significantly. Accessories like tripods and lenses further enhance the creative possibilities.
With practice and experimentation, anyone can capture breathtaking photos that showcase their unique perspective. Embracing these tips will lead to impressive results and a newfound appreciation for smartphone photography.